
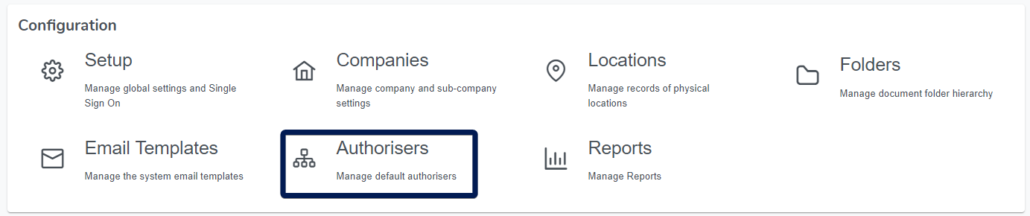
In this section you can define your Organisations workflow process for any Employee Request that requires authorisation, we call this the Authorisation Process.
You have the flexibility of being able to define this Authorisation Process against the Organisation, the Company, the Department, the Leave Type, the Employee or a mixture of them all.
This is because the Authorisation Process uses inheritance which means that you can define a process at the top, the Organisation, and it will automatically be applied to all Companies, all Departments, all Leave Types and all Employees underneath unless a process has also been defined at any one of those levels.
This inheritance minimises the amount of administration that is required to not only setup the system but also add new Employees or new Departments as the Authorisation Process is inherited from its parent.
Authorisation Process Workflow
HR Planner will use the following order to find a non-inherited process starting at the Employee level:
Employee

Department
Company
Organisation
To help you understand the inheritance used by the Authorisation Process, here are a couple different scenarios:
Scenario 1
If every Employee, their Departments and their Company Leave Type were all set to Inherit and the Company, the Leave Type and the Organisation each had their own defined processes the Authorisation Process would be taken from the Company level as that would be the first defined process.
Scenario 2
If you defined a custom Authorisation Process everywhere, the only process that would be used would be at the Employee level as the system would stop at that first level. The other defined processes would never be used.
Employee Requests
So, now that you know how the Authorisation process is applied let’s look at what you can define for it.
There are 6 different Employee Requests where you can define an Authorisation Process:
1. Leave Request
A request for any leave type that requires authorisation will use this process.
2. Allowance change Request
This process is used when a request is made to add or remove days/hours from a Leave Type that has an Allowance.
3. Profile change Request
When an employee has Propose access to either their own or another user’s Profile any change they make will follow this process for the Approval.
4. Expense Request
When an Expense is submitted for Approval, this is the process it will follow.
5. Skills Request
When a Skill is submitted for Approval, this is the process it will follow.
6. Employee event Request
When an Employee event is submitted for Approval, this is the process it will follow.
Authorisation Structure
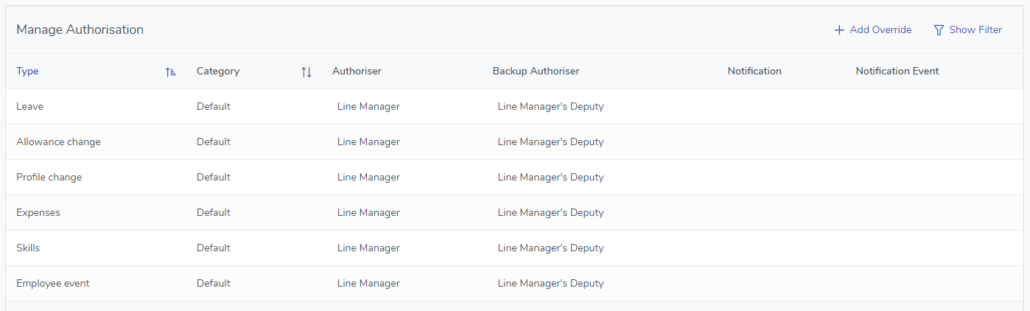
The default Authoriser is set to Line Manager for everything. This is the correct Organisation setting for a new company.
Unless everyone in your Organisation is going to use a single Authoriser for a Request Type, we would recommend that you leave this as it is and instead configure the Authorisation Process at either the Company or Department level which we will cover shortly.
If you would like to change or read more information about the current Authorisers or Notification settings then please read on otherwise jump to Configuration – Setup.
Authorisations and Notifications
For each of the Request Types you can define and override the Authorisation and Notification settings.
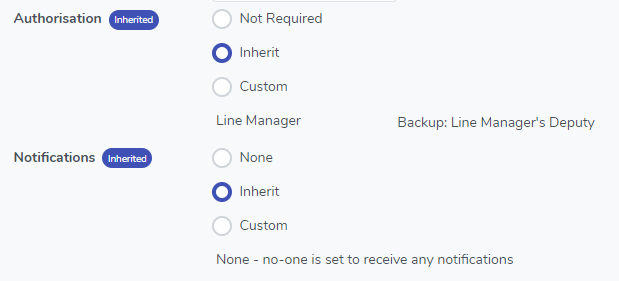
To override the Default Authorisation process click on the “+Add Override” button

Authorisation
This is a list of the Authorisers that will need to Approve or Decline the selected Request Type in the order of approval.
Selecting Not Required will disable any authorisation requirement meaning any future Requests are automatically approved as soon as they are made.
Selecting Inherit, which is the default, will make this Request Type inherit the setting from its parent item, according to the Authorisation Process Workflow. When an option is set to Inherit you will see the outcome of the inherited setting displayed.
Selecting Custom will allow you to select one or more users as the authorisers where the first person in the list is the Primary Authoriser and the second is the Secondary Authoriser and so on. When there are multiple Authorisers defined, a Request must be Authorised by the Primary before it is sent to the Secondary. If the Primary Authoriser declines the Request the Secondary Authoriser is never notified as no action is ever required from them.
Notifications
This is a list of users who will be Notified when an action is carried out for this Request Type. The actions are Requested, Authorised, Declined, Cancelled and Modified. Anyone specified in the Notification list does not have any involvement in the Approval process but will instead receive an email notifying them that this action has been carried out.
Selecting None will disable any notifications from being sent.
Selecting Inherit, which is the default, will make this Request Type inherit the setting from its parent item, according to the Authorisation Process Workflow. When an option is set to Inherit you will see the outcome of the inherited setting displayed.
Selecting Custom will allow you to select one or more users to be notified as well as what action to notify them about.
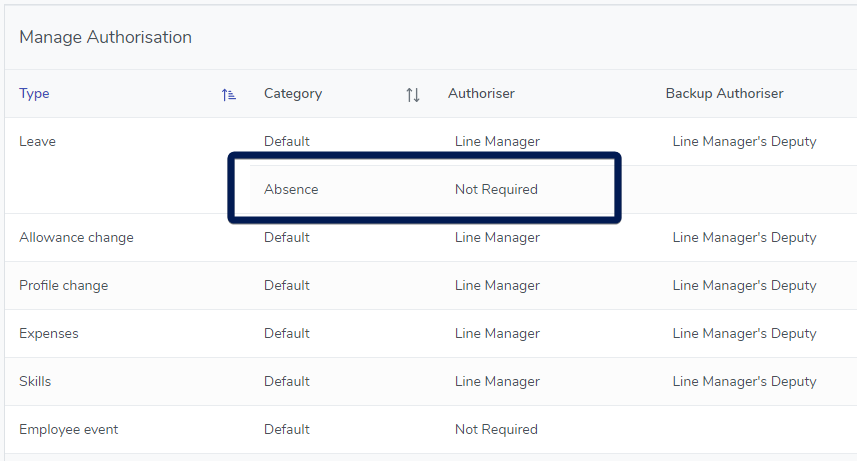
In the screenshot below you can see that we have added an override for the Absence Leave Type as it does not require Authorisation.
There are a few terms which you will see when choosing and viewing the Authoriser list and we will explain there here.
Line Manager
When you are selecting an Authoriser, one of the options that you can choose is Line Manager. This setting is defined per employee in their Profile within the Employment group. If an employee has no Line Manager defined and their effective Authorisation process is set to Line Manager, any Requests for this employee will not require Approval, because there is no Line Manager, and will therefore be submitted as self-authorised.
Backup Authoriser
Another option you will see when selecting an Authoriser is a Backup Authoriser. This is someone who can action any Requests that are made when they are absent. The system will know when an Authoriser is off, if it is logged in the platform, and will send the Request to their Backup Authoriser as well as the original Authoriser.
The Backup Authoriser will only get an email and be alerted to an outstanding Request when the Authoriser is away, according to the system, however they can Approve or Decline Requests at any time and view any outstanding requests for the Authoriser they are a Backup for by viewing their Tasks screen and selecting “Show tasks for all employees”.
Authoriser’s Deputy
When choosing a Backup Authoriser you will see the option Authoriser’s Deputy. This value is defined per employee in their Profile section within the Employment group. You are choosing someone who can action any requests for them when they are away, so you only need to specify an Authorisation Deputy for anyone who is an Authoriser.