

No single “all singing, all dancing” HR Platform could ever fit every Company as quite rightly different companies need to record different information, and this is where Attributes come in.
Attributes are setup to record information in a variety of formats from simple plain text through to multiple tick boxes.
You can setup as many Attributes as you need and control not only where those Attributes are created but also who has access to them – it’s a truly powerful feature that we are very proud of!
To further illustrate what you can do, let’s break down the default Employee Profile that we initially setup for you:
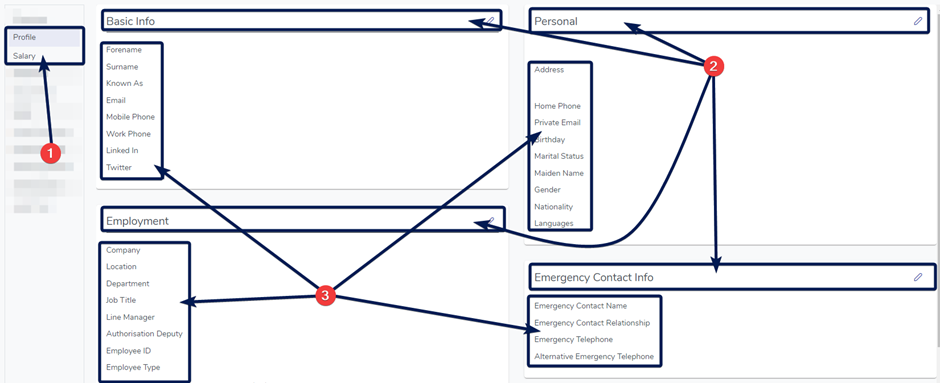
In the screenshot above we are displaying a collection of Attributes (3) that are contained within Sections (2) and displayed on a Tab (1).
Each of the Attributes above has a defined Location, Type and Sort Order which is used when building the page.
i.e. The “Forename” Attribute is first in the “Basic Info” Section on the “Profile” Tab and the “Company” Attribute is first in the “Employment” Section on the “Profile” Tab
Your system has been setup with a basic Template for your employee data, but you can add, or remove, as many Attributes and Sections as your business needs.
You can decide what additional information you need to record and where you want to record it.
Let’s take a look at where you can create an Attribute.
Attribute Locations
When you want to add or edit an Attribute you will need to specify where it is displayed by selecting the Parent Section property.
You can choose from the following Locations:
1. Profile
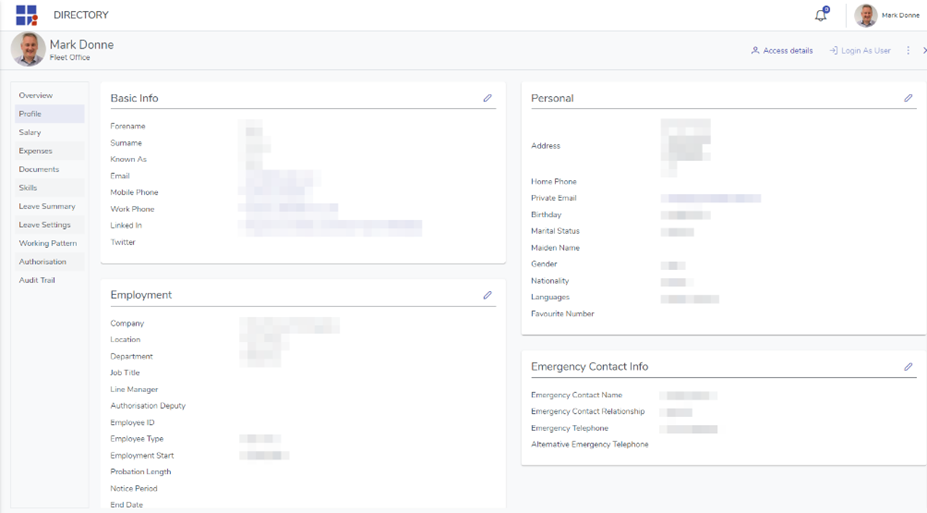
This is the Employee Profile Tab where you can add both Sections and Attributes. An Attribute must always be contained within a Section.
2. Salary
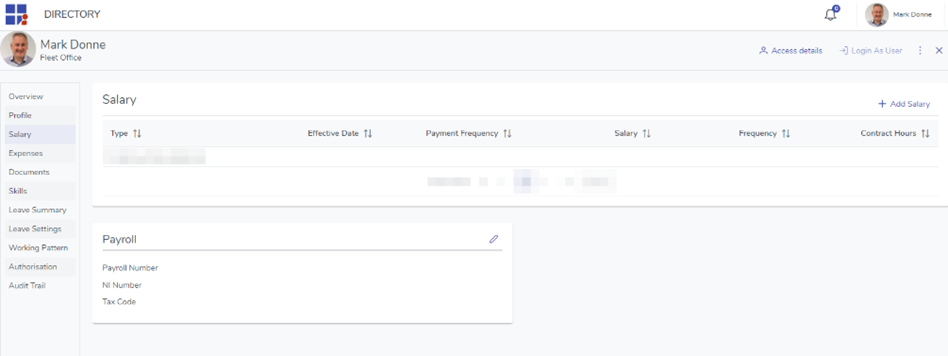
This is the Employee Salary Tab where you can add both Sections and Attributes. An Attribute must always be contained within a Section.
3. Expenses – Claims
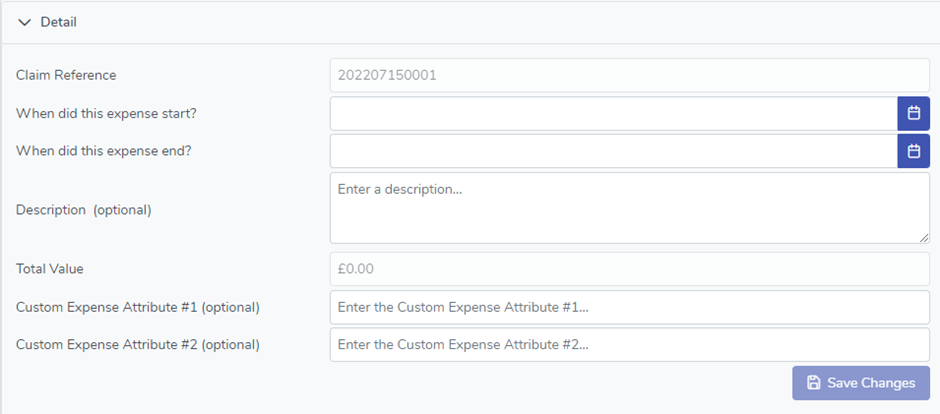
This location is the header which appears at the top of every Expense Claim. Any Attributes you add marked as “Is Required” must be completed before the Expense could be submitted for Approval.
4. Expenses – Claim Items
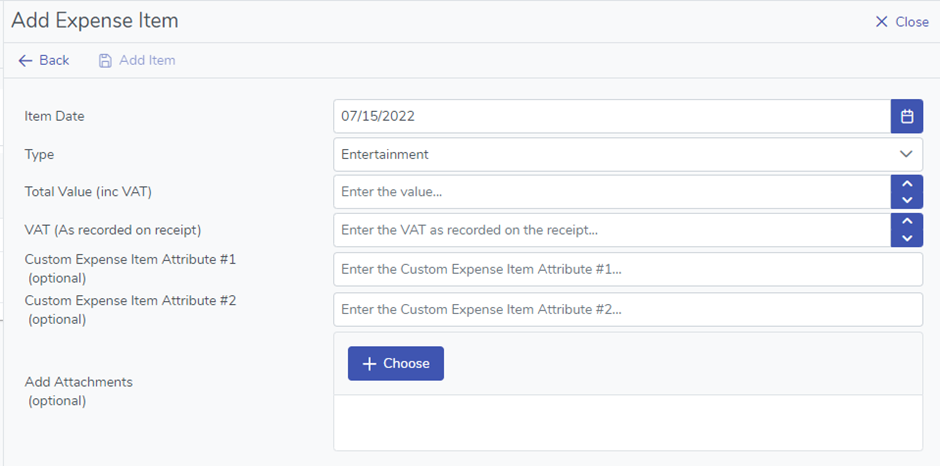
Every Expense Claim is made up from one or more Expense Claim Items and this is where you can add additional Attributes to your individual items.
5. Skills
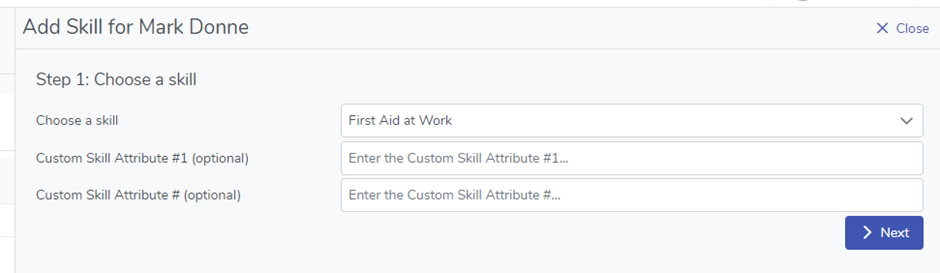
When a Skill is added for an employee you can request additional information by adding Attributes to the Skill Location.
6. Certificates
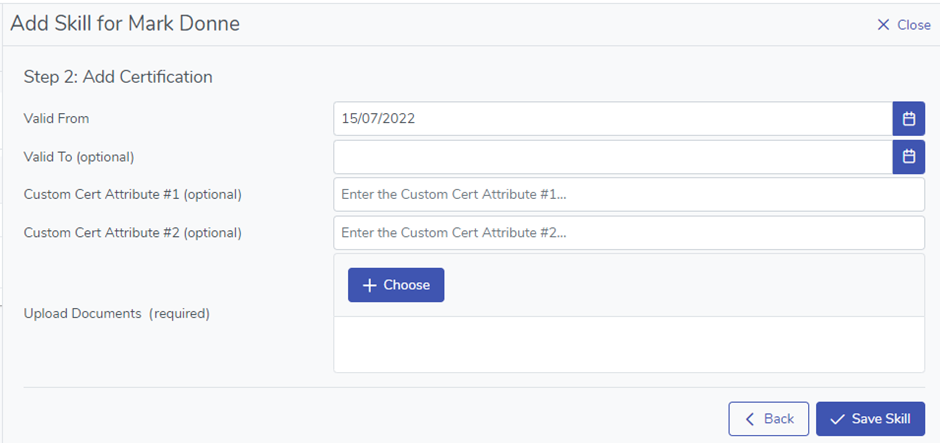
Certificates are added to the system against Employee Skills. When a Certificate is added to a Skill you can request additional information by adding Attributes to the Certificate Location.
Now you know where you can create an Attribute, let’s look at what Type of Attributes you can create.
Attribute Types
When you create a new Attribute you will need to choose what Type of Attribute it is. This Type controls not only the information that can be stored in it but also how we present the information to the user when viewing and editing the data contained within it.
You can choose from the following Types of Attribute:
1. General
This is used for storing a single line of plain text.

2. Multiline
This will store multiple lines of plain text.

3. Single selection
This will present the user with a drop-down list of entries where they can select only one.
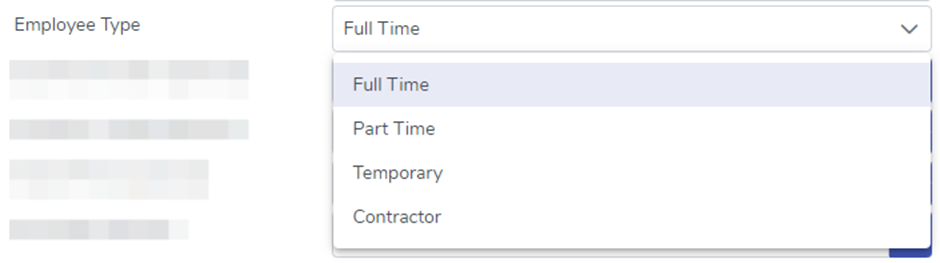
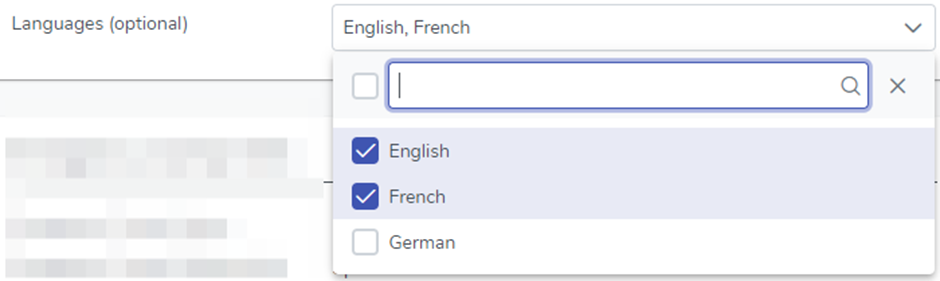
4. Multiple selection
This will present the user with a drop-down list of entries where they can select one or more.
5. Email
This is used for storing a single email address where the information entered is turned into an email hyperlink.

6. Link
This can be used for storing a website address or other internal hyperlink. The information entered is turned into a working hyperlink.

7. Integer
This can be used for storing whole positive, negative or zero numbers. A spinner can be used to increment or decrement the value.
Examples of integers are: -5, 1, 5, 8, 97 and 3043

8. Decimal
This can be used for storing positive, negative or zero numbers with a decimal point. A spinner can be used to increment or decrement the value.
Examples of decimal are: -5.5, 1.1, 5.225, 8.321, 97.27435 and 3043.01
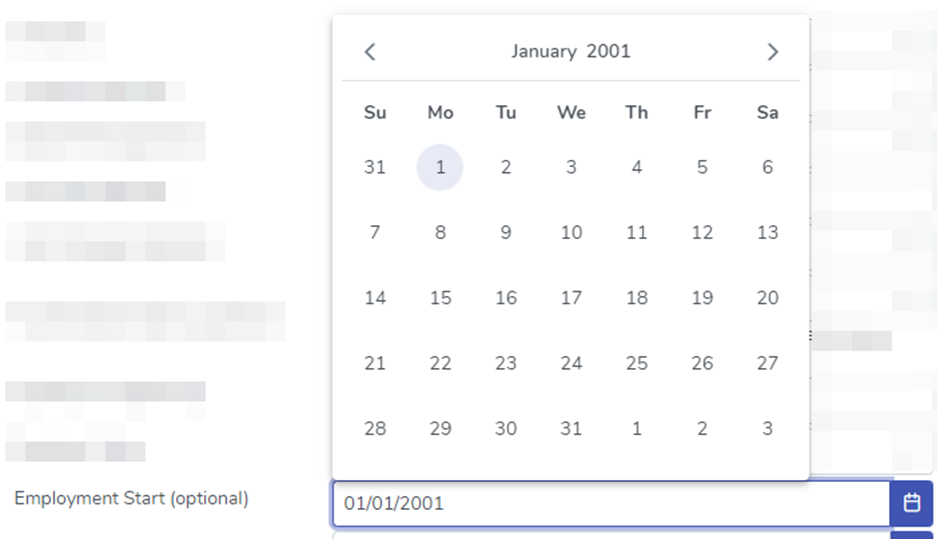
9. Date
This is used for storing a single date and will provide the user with a calendar to choose one.
10. Address
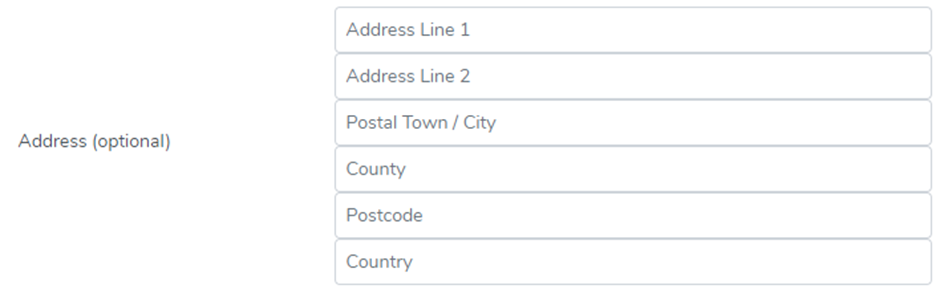
This is a special Attribute for storing location information in 6 predefined fields:
Address1, Address2, Postal Town/City, County, Post Code and Country
Attribute Properties
Once you have decided on the Type of Attribute you want to add you just need to configure a few more properties which control how and where you want this Attribute to appear.
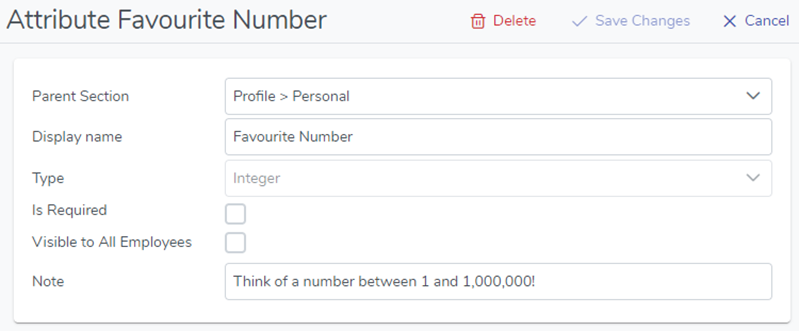
Parent Section
The Section where you want the Attribute to appear. Please note that the security surrounding who can View, Propose and Edit data is configured per Section so ensure you place any sensitive data in the relevant Section.
Display Name
The Text you want displayed to the left of the Attribute when viewing and editing the data.

Type
The Attribute Type to use
Is Required
If the requirement for this data is compulsory then tick this box otherwise the data is considered optional and does not have to be provided.
Visible to All Employees
Any Attribute that is marked “Visible to All Employees” will display the contents of its data in the Directory List for everyone within the Organisation to see. This property allows you to control the level of detail that is given to All Employees when looking at other employees in the Directory.
Attributes like Forename, Surname and Email address are generally considered safe Attributes to make available to everyone within an Organisation, but an Attribute like Home Phone would be considered Private and should only be made available to authorised employees.
Note
If the Attribute Display Name is not obvious then you can provide some information on what data you would like entered and this Note will be displayed under the Attribute when it is being edited.
